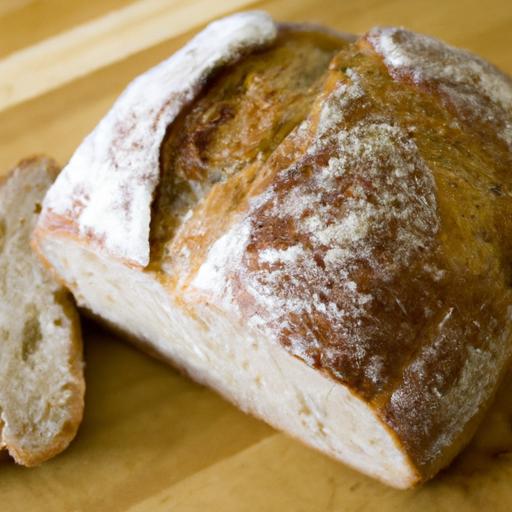


There’s something utterly enchanting about the aroma of freshly baked bread wafting through your kitchen-a warm invitation that tugs at the heart and awakens the senses. Welcome to Bake Bliss: Your Ultimate Guide to Homemade bread magic, where the humble loaf transforms into a canvas for creativity, comfort, and tradition. Whether you’re a curious beginner or a seasoned baker seeking new inspiration,this guide will unravel the secrets behind those golden crusts and pillowy crumb textures. Prepare to embark on a journey through flour-dusted countertops and bubbling yeast, where science meets artistry and every slice tells a story of homemade love. Let’s turn simple ingredients into edible joy and make bread-baking a magical ritual in your own home.
Bake Bliss: Your Ultimate Guide to Homemade Bread Magic begins with selecting the finest ingredients that transform simple dough into a warm, fragrant masterpiece. Envision the comforting aroma kissing your kitchen as the crust turns golden-brown, inviting you to slice through the tender crumb inside. This enchanting process starts with the foundation-flour, yeast, water, and salt-each chosen with intention, setting the stage for a perfect loaf every time.
Prep and Cook Time
- Preparation: 20 minutes
- Rising: 1 to 1.5 hours
- Baking: 30 to 40 minutes
- Total Time: Approximately 2 hours
Yield
One standard 9-inch loaf, perfect for 8 generous slices.
Difficulty Level
Medium – Ideal for home bakers eager to deepen their mastery of dough and flavor.
Ingredients
- 3 ½ cups (440g) bread flour, sifted
- 2 teaspoons active dry yeast
- 1 ¼ cups warm water (around 105°F / 40°C)
- 2 teaspoons fine sea salt
- 1 tablespoon honey or pure maple syrup (for natural sweetness)
- 2 tablespoons extra-virgin olive oil
- Optional flavor add-ins: 1/4 cup chopped toasted walnuts, 2 teaspoons fresh rosemary finely chopped, or 1/3 cup golden raisins
Instructions
- Activate the yeast: In a small bowl, combine warm water and honey. Sprinkle yeast on top and let it bloom for about 10 minutes until frothy and aromatic-this guarantees lively yeast, pivotal for rising.
- Mix the dry ingredients: In a large mixing bowl, whisk together the bread flour and sea salt. This ensures even seasoning throughout the loaf.
- Combine wet and dry: Make a well in the flour mixture and pour in the yeast mixture and olive oil. Stir using a wooden spoon until the dough starts to pull together.
- Knead the dough: Transfer dough onto a lightly floured surface. Knead vigorously for 8-10 minutes until smooth and elastic.If using add-ins, fold them in during the final-minute kneading for consistent distribution.
- First rise: Shape dough into a ball and place it in a lightly oiled bowl,turning it once to coat. Cover with a damp cloth or plastic wrap and let proof in a warm spot for 1 to 1.5 hours, until doubled in size.
- Shape the loaf: Gently deflate the dough and transfer onto a floured surface. Shape into a tight loaf by folding and rolling, then place into a greased 9-inch loaf pan.
- Second rise: Cover and rest for 30-40 minutes until puffed and nearly doubled again.
- Bake to golden perfection: Preheat oven to 375°F (190°C). Optionally, slash the dough top with a sharp blade for an artisan look. Bake for 30-40 minutes, or until the crust is deeply golden and the loaf sounds hollow when tapped on the bottom.
- Cool and rest: Remove bread from pan and cool completely on a wire rack before slicing.This rest time improves texture and flavor progress.
tips for Success
- Water temperature matters: too hot will kill the yeast; too cold slows the rise. Aim for 105°F/40°C for optimal activation.
- flour alternatives: artisan bakers can substitute up to 25% whole wheat flour for nuttier flavor and denser crumb.
- Humidity and time: Rising times vary with humidity and temperature; patience yields the softest crumb.
- Flavor enhancers: Toast spices like fennel seeds or lightly crush garlic into the dough for a savory twist.
- Make-ahead: Prepare dough the night before, refrigerate during first rise, and bake fresh in the morning.
Serving Suggestions
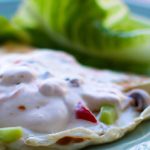
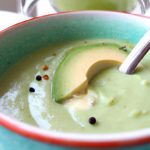
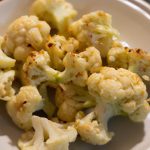
Slice warm bread and spread with creamy grass-fed butter or velvety avocado mash topped with flake sea salt. pair with a bowl of hearty vegetable soup for an inviting meal.Garnish with freshly chopped herbs like basil or thyme for vibrant color and fresh aroma. For breakfast, toast slices until crisp and drizzle with honey or nut butter for a sweet start.
| Nutrient | Amount per Slice |
|---|---|
| Calories | 160 kcal |
| Protein | 5 g |
| carbohydrates | 30 g |
| Fat | 3 g |
Explore related variations to deepen your baking skills or visit King Arthur Baking’s Bread Guide for expert insights.

Q&A
Q&A: Bake bliss – your Ultimate Guide to Homemade Bread Magic
Q1: What makes homemade bread so special compared to store-bought loaves?
A: Homemade bread is a labor of love-you control every ingredient, ensuring freshness and quality. Plus, it fills your home with an irresistible aroma and offers a texture and flavor that mass-produced bread can’t match. Each loaf is a unique creation, a little edible masterpiece born from your own hands.
Q2: I’ve never baked bread before. Where should I start?
A: Begin simply! Try a basic white or whole wheat loaf with just flour, water, salt, and yeast. Mastering thes core elements helps you understand dough behavior and baking times. As confidence grows, experiment with seeds, herbs, or even fruit to add your personal touch.
Q3: Why is kneading dough so crucial? Can I skip this step?
A: Kneading activates gluten-the network that gives bread its chewy texture and structure. Without proper kneading, your loaf might turn out dense or crumbly. If you’re short on time, using a stand mixer or a no-knead recipe are great ways to achieve similar results without elbow grease.
Q4: What’s the secret to getting a perfect crust on homemade bread?
A: It’s all about steam and temperature.Introducing steam in the first 10-15 minutes of baking helps create a crisp, golden crust. You can do this by placing a pan of hot water in the oven or spritzing the dough with water. Also, baking at a hot temperature (usually around 450°F/230°C) encourages that beautiful crust to form.
Q5: Can I bake bread without commercial yeast?
A: Absolutely! Sourdough is the magical answer. it uses natural wild yeasts captured from the environment, creating complex flavors and beautiful textures. Though it requires a starter and a bit more patience, the results are wonderfully rewarding-and every loaf tells a story of fermentation and time.
Q6: How should I store homemade bread to keep it fresh longer?
A: bread is happiest at room temperature, wrapped in a clean cloth or bread bag to keep moisture balanced. Avoid refrigeration-it dries bread out faster. For longer storage, slice and freeze it. Toast or gently reheat frozen slices to revive that fresh-from-the-oven charm.
Q7: I love experimenting. What are some creative add-ins for my bread dough?
A: The possibilities are endless! Think toasted nuts, sunflower seeds, dried fruits like cranberries or apricots, fresh herbs such as rosemary or thyme, or even a sprinkle of spices like cinnamon or cumin. Incorporate these thoughtfully to complement the bread’s flavor without overwhelming its natural essence.
Q8: How do I know when my bread is fully baked?
A: Look for a deep golden brown crust, a hollow sound when you tap the bottom, and an internal temperature around 190-210°F (88-99°C) if you have a kitchen thermometer. Patience here is key-underbaking leads to gummy interiors, while overbaking can dry out your loaf.
Q9: Can gluten-free bread be just as delicious as traditional bread?
A: Definitely! Gluten-free baking requires different flours and techniques,but with the right mix-rice flour,tapioca starch,and xanthan gum-you can create moist,tasty loaves. It’s a fun challenge and a great way to add variety and inclusivity to your baking repertoire.
Q10: What’s the most rewarding part of baking your own bread?
A: Beyond the delicious results, it’s about the connection you build-with tradition, with ingredients, and sometimes even with those who share your table. Baking bread is a tactile meditation, a nourishing craft that brings joy and comfort slice after heartfelt slice.
Turn your kitchen into a sanctuary of Bake Bliss, where flour-dusted counters and warm ovens invite you to discover the magic kneaded within each loaf. Happy baking!
Insights and Conclusions
As the warm aroma of freshly baked bread fills your kitchen, remember that each loaf you create is more than just food-it’s a delicious journey of tradition, creativity, and comfort. With “Bake Bliss: Your Ultimate Guide to Homemade Bread Magic” in hand, you now hold the keys to unlocking endless possibilities, from rustic sourdoughs to tender brioche. So dust off your apron, embrace the art of fermentation, and let your hands craft masterpieces that nourish both body and soul. Because when it comes to bread, the magic truly happens at home. Happy baking!