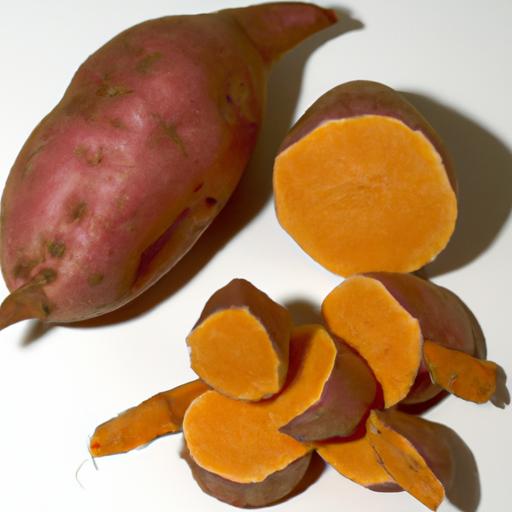


There’s something magical about the vibrant orange flesh adn earthy sweetness of a homegrown sweet potato – a humble tuber that transforms simple meals into comforting feasts. But before you savor that first bite, there’s a journey beneath the soil that’s as rewarding as the harvest itself. Welcome to “Sweet Success: A Step-by-Step Guide to Growing Sweet Potatoes,” where we’ll unravel the secrets to cultivating these delicious gems right in your own garden. Whether you’re a seasoned gardener or a curious beginner, this guide will take you through every stage, from selecting slips to nurturing your plants, ensuring that your sweet potato adventure yields bountiful roots and a genuine sense of accomplishment. Let’s dig in and start planting the seeds of your sweetest harvest yet!
Sweet success begins with thoughtful choices-from selecting the ideal sweet potato varieties to nurturing them with care in your garden. Whether you’re cultivating in a warm southern climate or a cooler temperate zone, understanding the nuances of your region’s soil, water needs, and natural pest control can transform your harvest into a vibrant, flavorful bounty.
Choosing the Perfect Sweet Potato Varieties for Your Climate
Not all sweet potatoes thrive under the same conditions. For warm, long-season climates, varieties like Beauregard and Covington excel with their high yield and sweet, moist flesh. In cooler or shorter growing seasons, try the Georgia Jet, known for its rapid maturity and cold tolerance. Research local agricultural extensions or consult seed catalogs specifically tailored to your USDA hardiness zone for the best match. Remember, selecting the right variety is the foundation of your sweet success.
preparing the Soil and Planting Slips for Optimal growth
Healthy soil is the heartbeat of a thriving sweet potato patch. Aim for a well-draining, sandy loam enriched with organic matter. Before planting, loosen the soil to at least 12 inches deep and incorporate 2-3 inches of compost, ensuring a nutrient-rich environment. Sweet potatoes grow best from slips-young shoots grown indoors or sourced from a garden center. Plant slips 12-18 inches apart, burying them up to their top leaves to encourage strong root progress.
Essential Watering and Fertilization Techniques for Bountiful Harvests
Regular, consistent moisture is crucial especially during the initial 6-8 weeks of growth. Water deeply onc or twice weekly, depending on rainfall, aiming to keep soil evenly moist but not waterlogged to prevent rot. Sweet potatoes prefer balanced nourishment; use a fertilizer with a ratio of 5-10-10 or similar low nitrogen content to encourage root growth. Side dress the plants 4 weeks after planting and again mid-season to sustain steady development and maximize sweet success.
Protecting Your Crop from Pests and diseases Naturally
Mother Nature provides manny allies in protecting sweet potatoes. Practice crop rotation each year to minimize pests like sweet potato weevils. Encourage beneficial insects by planting companion flowers such as marigolds nearby. When spotting early signs of fungal infection or pests,employ organic controls like neem oil sprays or insecticidal soap. Mulching with straw or shredded leaves helps maintain moisture and limits weed growth, reducing competition and disease pressure. Vigilance and natural prevention are key to a thriving, chemical-free crop.
Prep and Cook Time
- Prep Time: 20 minutes (soil readiness and slip planting)
- Growth Time: 90-120 days depending on variety
- Harvest Time: Late summer to early fall (when leaves yellow)
Yield
Each slip typically yields one medium to large sweet potato, scaling up to 10-12 sweet potatoes per 100 square feet depending on care and variety.
Difficulty Level
Moderate – Requires attention to soil health, watering schedules, and pest management but perfect for dedicated gardeners aiming for sweet success.
Ingredients for Rich, Garden-Fresh Sweet Potatoes
- Sweet potato slips: 10-12 healthy shoots, selected by variety suited to your climate
- Compost or well-rotted manure: 2-3 inches to enrich soil
- Balanced fertilizer (5-10-10): For side dressing during growth
- Mulch: Straw or shredded leaves to conserve moisture and suppress weeds
Instructions
- Prepare your soil: work the compost thoroughly into loosened, well-draining soil at your planting site.
- Start slips indoors or purchase: Root slips in warm windowsills 4-6 weeks before last frost or acquire from trusted nurseries.
- Plant slips: Space 12-18 inches apart, bury slips deeply to the first set of leaves for solid rooting.
- Water consistently: Deeply soak soil once or twice weekly; avoid letting the soil dry out.
- Fertilize cautiously: Apply side dressing fertilizer 4 weeks after planting and repeat mid-season for continued nourishment.
- Mulch around plants: Use straw to retain moisture and reduce weeds without suffocating roots.
- monitor pests: Inspect leaves weekly. Use neem oil or insecticidal soap on early pest problems.
- harvest when leaves yellow: Gently loosen soil with a fork, carefully lift sweet potatoes to avoid bruising.
Chef’s Notes & Tips for Success
- For cooler climates, start slips indoors earlier to maximize the growing window.
- If your soil tends to be heavy clay, consider raised beds or adding sand to improve drainage.
- Rotate crops annually to reduce soil-borne diseases and pest buildup.
- When curing your harvest, keep sweet potatoes in a warm, humid environment ~85°F for 5-7 days to enhance sweetness.
Serving suggestions
Roast your homegrown sweet potatoes with a drizzle of local honey and a sprinkle of fresh thyme for a simple, elegant side. Or mash them with coconut milk and a hint of cinnamon for a creamy, comforting dish. Garnish with toasted pecans or fresh chives to elevate presentation and flavor. Remember, the story of your sweet success shines brightest when you plate with care and creativity!

| Nutrient | Per medium Sweet Potato (130g) |
|---|---|
| Calories | 112 |
| Protein | 2g |
| Carbohydrates | 26g |
| fat | 0.1g |
For more detailed gardening techniques, check out our Ultimate Guide to Organic Vegetable Gardening.Additionally, the University of minnesota Extension offers thorough insights on local sweet potato cultivation.
Q&A
Q&A: Sweet Success – Your Step-by-Step Guide to Growing Sweet Potatoes
Q1: Why grow sweet potatoes instead of regular potatoes?
A: Sweet potatoes aren’t just deliciously sweet; they’re packed with nutrients like beta-carotene, vitamin C, and fiber. Unlike regular potatoes, sweet potatoes thrive in warmer climates and offer a vibrant splash of orange (or even purple!) to your garden and plate.Plus, growing them yourself means fresher, tastier tubers straight from soil to supper.
Q2: When and where should I plant sweet potatoes?
A: Timing is everything! Sweet potatoes love the warm sun and long growing seasons. Plant your slips (young sprouts) after the last frost when soil temperatures are consistently above 65°F (18°C). Find a sunny spot with well-drained, sandy loam soil – they adore warmth and hate soggy feet.
Q3: How do I prepare my sweet potato slips for planting?
A: Start by purchasing healthy slips or sprouting your own from store-bought sweet potatoes. To sprout, place a sweet potato half-submerged in water with toothpicks, upside down, near a sunny window. Roots and shoots will appear in a few weeks. once the slips reach 6-8 inches, gently separate them from the tuber and pot them up before transplanting outdoors.
Q4: What’s the secret to planting sweet potatoes successfully?
A: Plant slips 12-18 inches apart in loose,fertile soil,burying them up to the first leaves. Sweet potatoes are creepers – give them space to spread! Keep the soil consistently moist but not waterlogged during early growth. Mulching helps retain moisture and keeps weeds at bay.
Q5: how do I care for my sweet potatoes during the growing season?
A: Sweet potatoes are pretty low maintenance, but regular watering (especially during dry spells) is key. Keep an eye out for pests like sweet potato weevils or fungal diseases; neem oil can be a helpful natural remedy. Fertilize lightly mid-season with a balanced fertilizer to encourage those luscious tubers underground.
Q6: when and how do I harvest sweet potatoes?
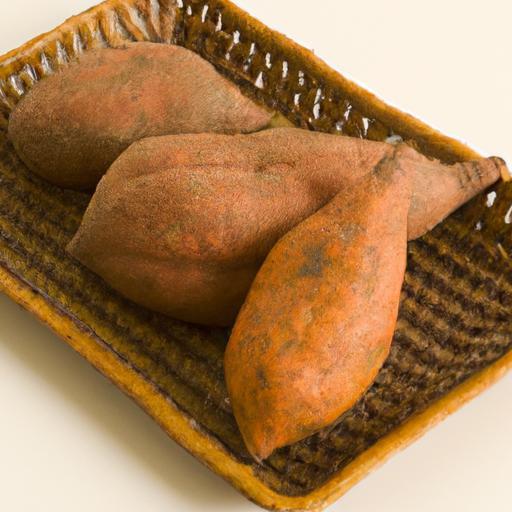
A: Patience rewards you here! Sweet potatoes are usually ready to harvest 90-120 days after planting, when their leaves start yellowing. Use a garden fork carefully to dig around the vines-avoid piercing the tubers. After harvesting, cure them by keeping them in a warm (80-85°F), humid spot for 7-10 days. This sweetens the flavor and toughens the skin for storage.
Q7: Can I save sweet potatoes for next season’s planting?
A: Absolutely! Select the healthiest, largest tubers to sprout slips for next year. Store them in a cool, dry place until you’re ready to start the cycle again. This makes growing sweet potatoes a sustainable tradition that keeps giving.
Q8: Any creative tips to boost my sweet potato harvest?
A: Try companion planting with beans or corn to enrich the soil naturally, and experiment with different sweet potato varieties for unique flavors and colors. Remember, happy plants make sweet, accomplished harvests!
With these steps mastered, you’re well on your way to sweet success in your garden – and your kitchen!
To Wrap It Up
As your sweet potato patch begins to flourish, remember that this humble tuber carries with it centuries of tradition, nourishment, and natural sweetness. By following these step-by-step guidelines,you’re not just growing a crop-you’re cultivating a story of patience,care,and homegrown reward. Whether you’re a seasoned gardener or a curious beginner, each vine that stretches and each root that swells is a testament to your dedication and the magic of nature’s bounty. So dig in, nurture your sweet potatoes, and savor the sweet success that comes from your own soil. Happy growing!